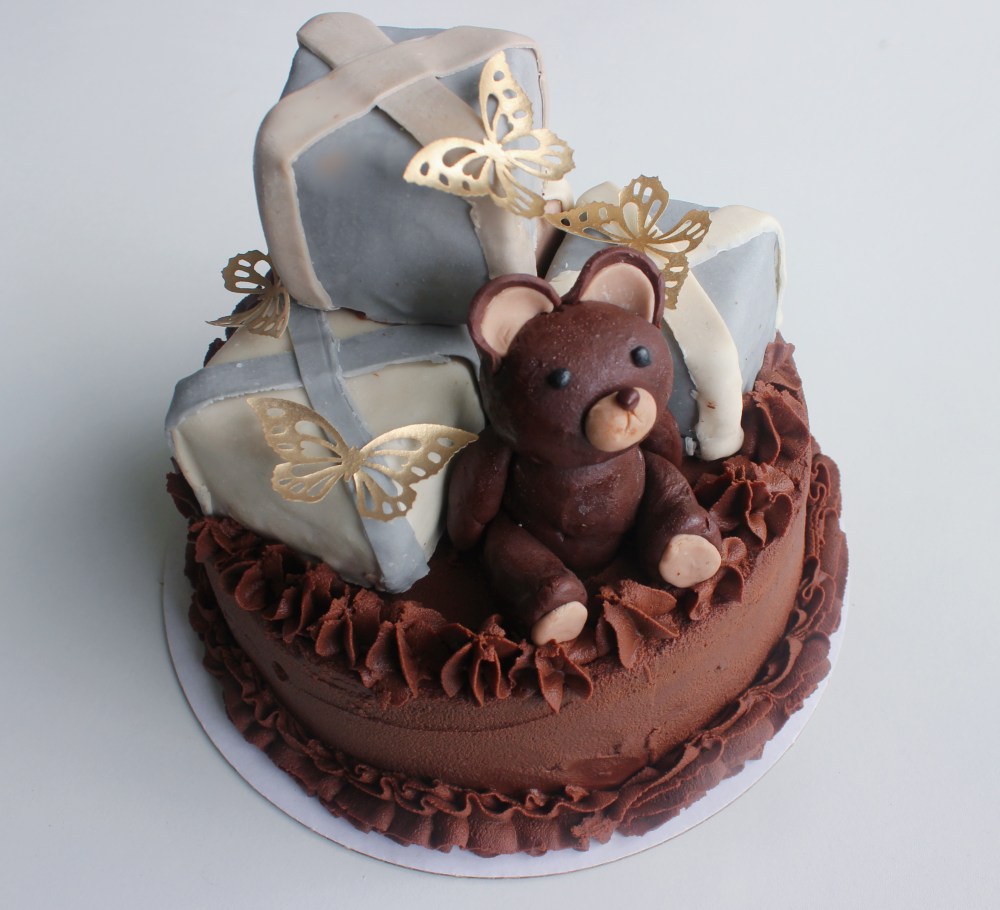
This cake was for a baby shower, where the invite featured a cute little teddy bear with light blue balloons. I wanted to pay homage to that image, and carry it through, along with the color scheme of the party in general, in the form of this cake. The clients requested the cake to be chocolate, so that already made a huge portion of my job easier, because I love chocolate cake. However, I definitely pushed myself and made arguably one of the most challenging recipes I have ever come up with. While the cake, fillings, and garnishes were easy, the issue was the assembly. The cake was made in two stages – an 8-inch round with three layers, and on top of that, cubes formed by baking cakes into a special mold. The cubes are made with the Martellato Square Loaf Cake Mold, which is a fancy loaf pan with a chimney running in the middle of it, resulting in cakes that have a circular hole running through them, perfect for injecting filling into! If you don’t have the mold, you can just pour the batter onto a sheet tray, and cut out square shapes, and stack those up like cake layers too. Honestly, that method will take a lot less time, and I just wanted to test the mold out, since I had purchased it and wanted to see how much batter is needed to fill it, and what the baking time for using it v.s. using a sheet tray or chiffon cake mold would be like. It does take more time than a sheet tray, less time than a chiffon cake mold, and uses about 2/3 the amount of batter that my standard 6-egg white chiffon cake recipe produces. These are notes for both you and future Fred when he comes up with new recipes using that mold.
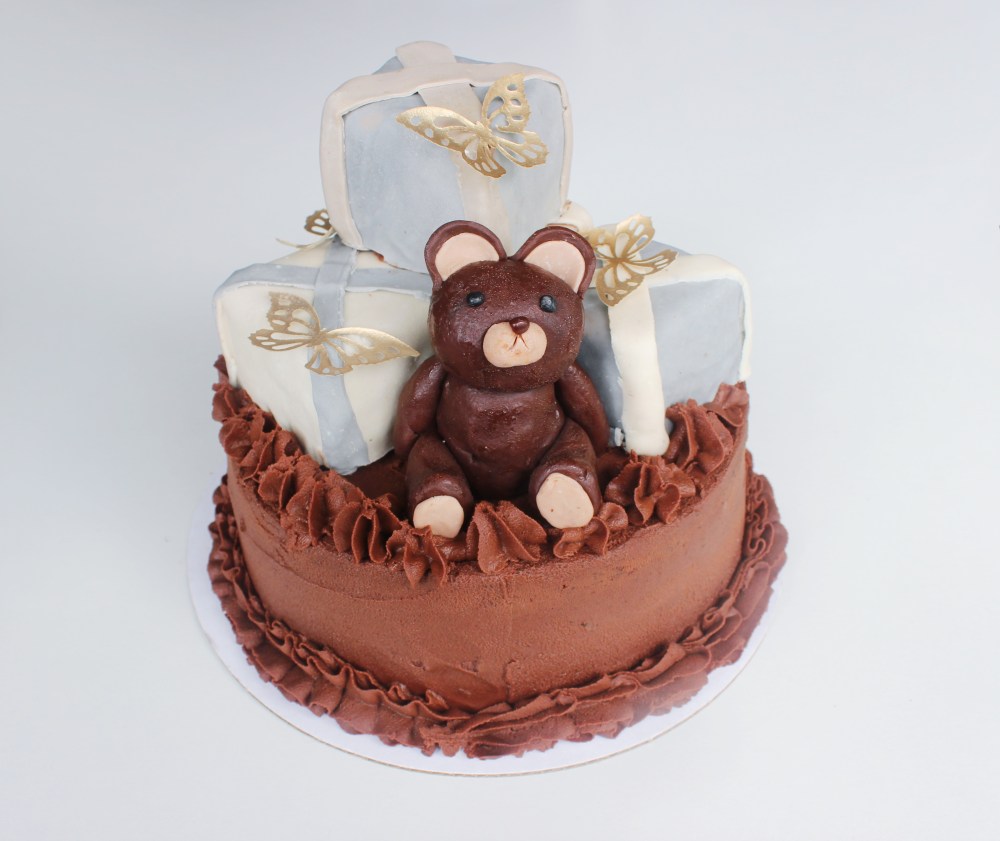
While making a cutely decorated cake with these little cake cubes decorated like present boxes sounded like a simple undertaking on paper, it was a lot of work. Firstly, you needed to make enough cake to form an 8-inch cake, and then enough for the present box cubes on top. Secondly, the frosting and layering of the cake is extremely time consuming, since you have to make sure that the cakes are cold enough to be stacked, and for the frosting to not melt, slide, and for it to have a smoother finish. And then you have the decorating. Fondant is a pain to use and it tastes gross, so I threw that option out the window. I went with modeling chocolate, since it tastes better, and I can use that to tie in better with the flavor of the cake being chocolate as well. That being said, it was still not easy to execute, since I made my own modeling chocolate from white or dark chocolate and corn syrup. And even from there, I had to then dye the white modeling chocolate, so that I had enough to enrobe my gift box cakes with, make ribbons to garnish the boxes/cover any seams, and to form features on the bear so it actually looks like a bear and not like a blob of dark modeling chocolate. My pastry background is more restaurant/plated dessert-oriented than it is about fondant and cake decorating, so this was definitely a challenge. But I had a surprising amount of fun with assembling it!
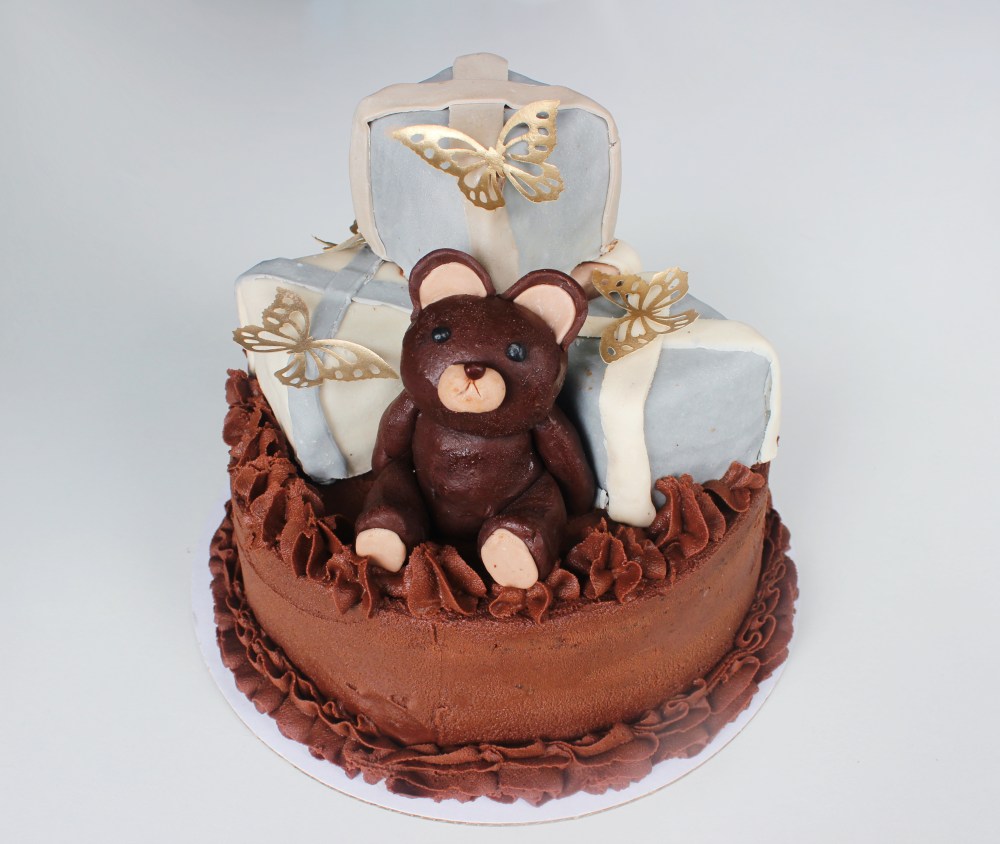
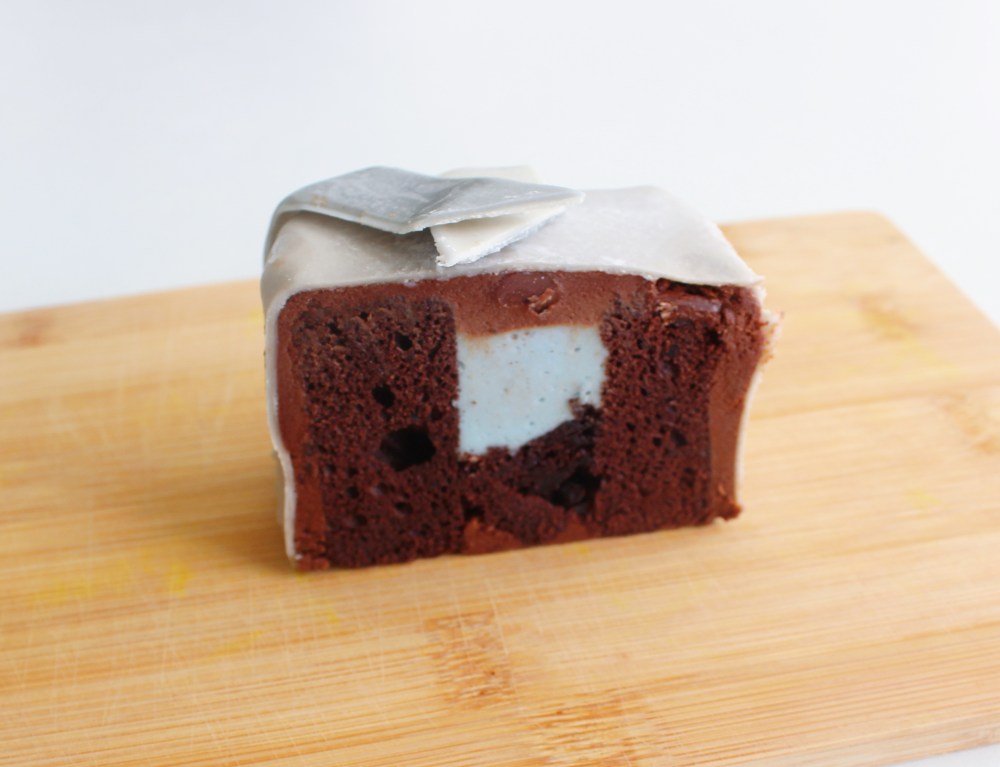
The cake was this soft and light chocolate chiffon, enrobed with a silky soft chocolate buttercream, a vanilla mousseline, which I dyed blue, since then when the cake it being cut into, it can be a part of the gender reveal(it’s a boy!), and we have the blue filling in both the layer cake and the gift box cakes, so no matter where the cake is cut into, the gender will be made apparent! I used crunchy chocolate pearls in the layers of the 8-inch cake for a textural contrast, while the gift boxes rely more on the modeling chocolate to provide a different texture. The bear is technically 100% edible, but it is a solid block of modeling chocolate, instead of a thin layer like with the box cakes, so that might be a little much on its own. I also used a malted milk soak on the cake, half because one of the colors I was shown for the baby shower included a color that was literally called that, and because I love malted milk with chocolate. And to help cover up any flaws, I used some rice paper butterflies as well, which add a little height, movement, and some fun pops of gold that really make the cake feel celebratory(which it is meant to feel, since you know, we’re celebrating a new mom-to-be/her little baby boy after all!). This is the kind of cake that you need at least a two to three days to execute. Just because there is a lot of refrigerating/freezing that goes into the components, especially since chocolate and butter are pretty heavily involved in several of the recipes. Just know that when you attempt to make it(and if you don’t want to decorate it, that’s totally fine, the chocolate cake on its own is quite delicious!).
For the malted ganache buttercream:
4 cups semi-sweet chocolate chips
1/2 cup heavy cream
3 tbsp malted milk powder
|1/4 cup milk
2 1/2 sticks unsalted butter
a pinch of salt
In a pot, melt everything together over low heat until combined. Pour onto a shallow sheet tray and freeze for 20 minutes. Transfer to the firmed up ganache to a stand mixer and whip until softened, as well as light and airy in consistency.
For the chocolate sponge:
12 egg whites
1 1/2 cups granulated sugar
2 tsp baking powder
a pinch of salt
1 tsp vanilla extract
6 egg yolks
1/2 cup cocoa powder
1/3 cup milk
1/2 cup canola oil
2 cups all-purpose flour
In a bowl, whip the egg whites with sugar, baking powder, salt, and vanilla extract to stiff peaks. In another bowl, whip the egg yolks with cocoa powder, milk, and canola oil. Sift into the egg yolk mixture your flour, then fold into that the egg whites to form your batter.
Line the Martellato Square Loaf Cake Mold with oil, the inner chimney included, then fill that mold 75% the way with batter, tapping it down to release any air bubbles. Do not use the lid on this pan, or the cake will explode! Pour the remaining batter onto a lined sheet tray. Bake the square loaf cake at 350 degrees F for 35 minutes. For the sheet tray, bake at 350 degrees F for 20 minutes.
With the square cake, allow it to cool at room temperature for 10 minutes before sawing off the excess from the top of the cake with a serrated knife. Then let the cake cool down, upside down, and in still in the mold, for another 20 minutes before removing the chimney insert and cutting the cake into 5 cubes.
With the sheet tray, cut out 2 rounds using an 8-inch ring mold, and bring together the scraps to form a third layer, that will be the base of the cake. With the excess scraps, press those into the holes of the cubes, to create a base or a plug so that the filling in the cakes don’t run out.
For the malted milk soak:
3/4 cups milk
2 tbsp malted milk powder
a pinch of salt
Mix everything together until combined. Keep refrigerated for initial assembly.
For the white chocolate mousseline:
1/2 cup white chocolate chips
1/3 cup milk
1 tsp gelatin powder + 2 tbsp cold water
1 tsp blue spirulina powder
1/4 cup heavy cream
Over a double boiler, melt the white chocolate down. In a pot, heat up the milk, gelatin, and blue spirulina until melted together. Pour the liquid into the white chocolate and stir until combined. Take the mixture off heat and whisk in the heavy cream to finish. Transfer to a piping bag for initial assembly.
For initial assembly:
Crunchy chocolate pearls
With the cube cakes, brush the sides with soak, and pipe the mousseline into the middle of each. You should still have a considerable amount of spare mousseline for the layer cake. Freeze the cube cakes first, as freezing them solid will result in much easier assembly for later.
In a lined 8-inch ring mold, start by laying down the scrap layers of the cake and pouring on 1/3 of the soak. Pipe a border of the ganache buttercream. Spread in the middle half of the remaining mousseline, and sprinkle on crunchy chocolate pearls as well. Repeat those steps with your next round of cake. For the last layer, place down the last round of cake, and pour on the soak. Spread on an even layer of the buttercream, and then freeze the cake solid, at least 2 hours, before attempting to unmold the cake.
Using the buttercream, spread thin, but even coatings of it around the cube cakes, and then return those to the freezer. Spread the remaining ganache buttercream onto the still-frozen layer cake. Return everything to the freezer until it is time to finish assembly.
For the homemade dark modeling chocolate:
1 cup dark chocolate chips
4oz corn syrup
a pinch of salt
Over a double boiler, melt everything together until just combined. Pour onto a nonstick surface, and transfer to the refrigerator to firm up the dough.
For the homemade white modeling chocolate:
1 cup white chocolate chips
2oz corn syrup
a pinch of salt
Over a double boiler, melt everything together until just combined. Pour onto a nonstick surface, and transfer to the refrigerator to firm up the dough.
For the present boxes:
White modeling chocolate
1/4 tsp activated charcoal powder
1/4 tsp cocoa powder
Cornstarch
Divide the white modeling chocolate into three pieces. Dye one piece with half of the activated charcoal. Dye one piece with half of the cocoa powder. And dye the rest using both. Reserve a small amount of the cocoa powder-only white modeling chocolate for the bear. With the rest, on a cornstarch dusted surface, roll out the modeling chocolate into 1mm-thick sheets, and enrobe the still-frozen cube cakes with them, trimming and reserving the excess. Using the excess trimmed chocolate, re-roll and cut them into strips to layer over your boxes to form ribbons. Allow your cakes to freeze just to keep the modeling chocolate firm for assembly.
For the bear:
Dark modeling chocolate
Activated charcoal powder
Reserved cocoa-dyed white modeling chocolate
Cocoa powder
Cornstarch
With the reserved white modeling chocolate, roll this out and cut out three 1/4-inch disks from it. With a small bit of the scraps, dye that black with the charcoal powder and roll out two eyes and a snout. Roll out the dark modeling chocolate and cut out one 1/2-inch disk. Press one of the two 1/4-inch disks into the 1/2-inch disk, and cut that in half to form your ears. With the remainder of the dark modeling chocolate, roll it into the bear, first forming the head, adding on the second 1/4-inch disk to form the snout, and press in the eyes and nose. Using a knife, carve in the mouth of the bear, and then add on the ears. Separately, using just the dark modeling chocolate, form the torso, then attach on the arms, and the legs. Using the last 1/4-inch disk, cut that in half, and press it into the feet of the bear to complete its paws. Refrigerate the bear so that it stays cold and moldable.
For garnish:
Residual buttercream
Rice paper butterflies
Unmold and frost the 8-inch cake using the residual ganache buttercream. With any spare, transfer to a piping bag and pipe buttercream borders around the cake. Garnish the top using the covered cube cakes, using buttercream to glue them together. Then place down your bear. Garnish the cake with the rice paper butterflies to finish.