This recipe was the biproduct of me making Japanese-style sando’s and cutting the crusts off the homemade milk bread I used to assemble those with. After making all of my sando’s, I literally had a fish tub-sized container of bread crusts leftover. It felt like a shame to just throw the crusts away after all of the money I spent on the ingredients to make the loaf itself, the effort I spent kneading that dough, and the time I spent proofing and baking it into bread. So, I thought about ways that I could take the leftover crusts, and really embrace them for what they are. Especially since I had so many bread crusts, it would be wrong to throw them away. My initial thought was either to make panko or even bread pudding out of them, but I already had tons of panko, and because of a prior experiences, bread pudding is not necessarily my favorite dessert(prior experiences meaning I almost fell head first into an oven trying to lift a hotel pan of it out of the oven, I’ve seen too many people make that on Chopped for dessert, and an ex of mine’s favorite dessert was bread pudding, so that kind of tainted it even more for me). Eventually, what I came up with was inspired by a couple of things. The first being matzoh crack.
I first had matzoh crack thanks to my old coworker/supervisor/friend, Amanda, back when we were in college teaching cooking classes together. For essentially a pseudo family meal(we were really just making snacks in between classes for funsies), she made us matzoh crack. For those unfamiliar with it, matzoh crack is layers of matzoh crackers that are smothered in toffee and chocolate. The matzoh is then cooled down, and shattered into these wafer-like chip! The end result is basically like an almond rocca chocolate, where there are crunchy, buttery bits, and chocolate-y bits. Super addictive, and worthy of having “crack” in the name – this might also be referencing the texture, since there are a lot of fun crackly bits in matzoh crack. On their own, matzoh crackers are similar to bread crusts – dry, kind of flavorless, but they have a pleasant toastiness to them. From a flavor perspective, I already knew that I had a decent match here. I could take the bread crusts, toast them until they are crunchy like a crouton, toss them in toffee and chocolate, and I would have something very similar, albeit bread stick or French fry-shaped, instead of a flat brittle or chip. However, there was another inspiration behind this recipe, being rusk.
For those unfamiliar with it, rusk is a bread-based snack that is very popular in both Japan and Korea. You basically toast bread, and toss it in sugar, so that you have these candied toast pieces. Rusk was something I ate a lot of in Japan during my homestay program, where my second host family would feed them to me often! There are several variations on rusk, but in this case, my variation combines the classic version, which is coating the bread in sugar, with a chocolate-covered rendition I had to do in my Japanese class. During junior year of my Japanese class, we had a Japanese cooking project, where the theme, hilariously enough, was Japanese desserts. One of the desserts we were asked to do was taking bread crusts, toasting them off, and tossing them in chocolate to make these crunchy rusk chocolate clusters. Fun fact, bread crusts in Japanese is called “pan no mimi”, which literally translates to bread ears. I distinctly remember laughing as I would eat the rusk clusters, since I was eating a bunch of bread ears. I’m weird like that, I guess.
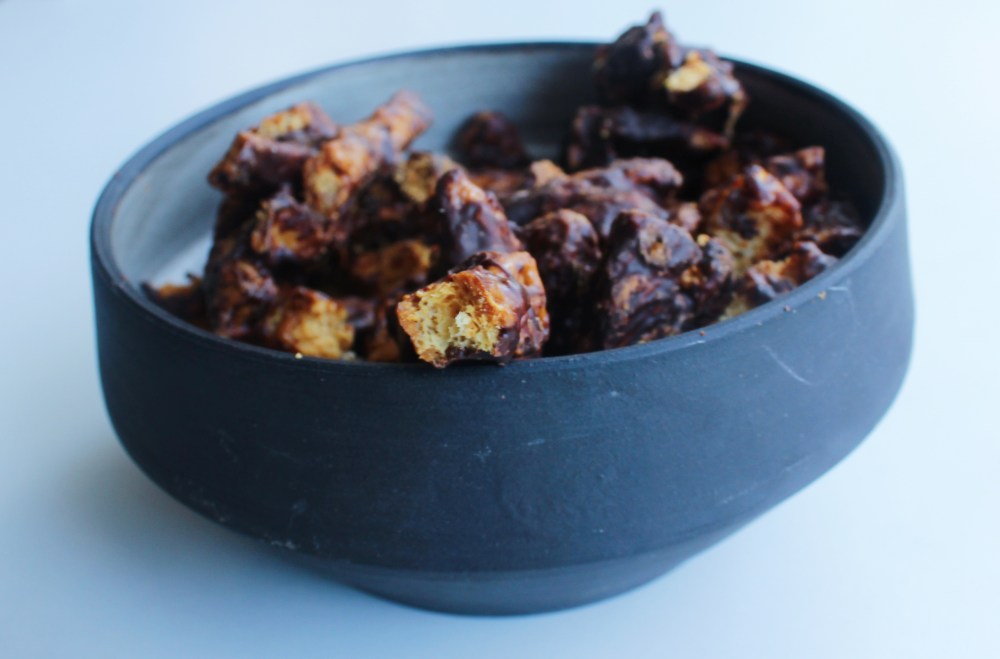
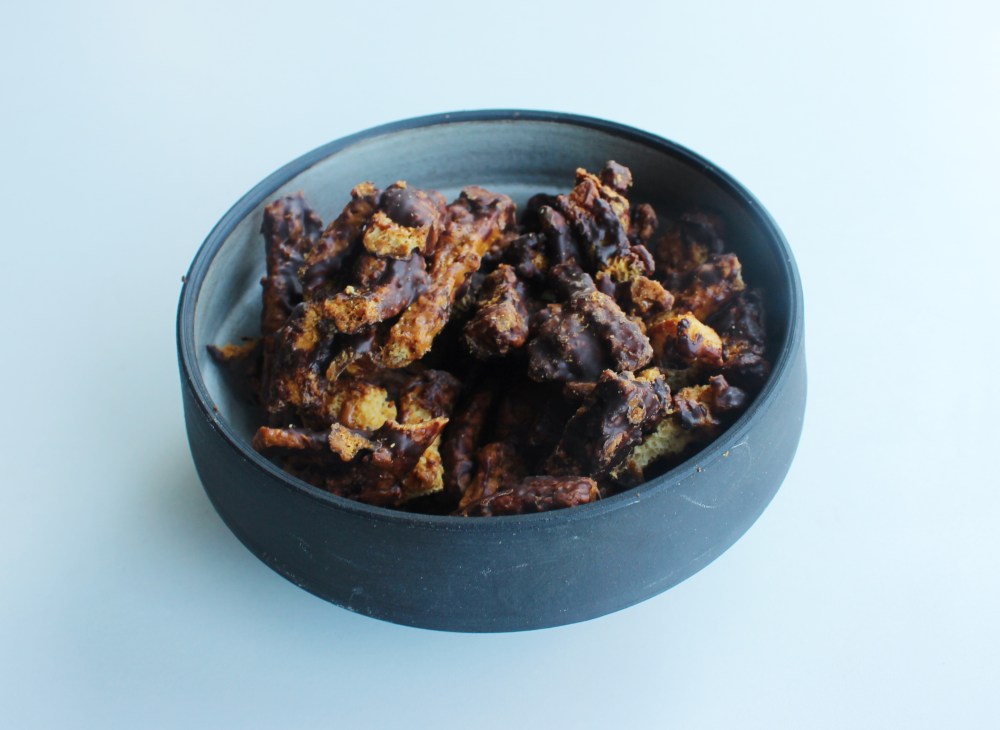
For this recipe, it is relatively straightforward. You got to toast bread, pour toffee on it, re-heat it so that the toffee melts down so that you can toss the bread in the melted down toffee for a more even distribution of caramel to bread, and then toss the still-warm toffee-covered bread sticks in chocolate so that the chocolate just melts around the sticks. The biggest technical step in this recipe is making the toffee. You need to really use your eyes(and/or a thermometer that can tell you when the sugar registers 315 degrees F) just to make sure you know when the sugar begins to brown. Once the sugar starts to turn an amber-gold color around the edges, add in the butter and salt to that and stir on low heat. The key here is that you want the milk fat and solids from the butter to cook out and emulsify with the caramelized sugar to form almost like a thick caramel sauce. That is what you’re looking to pour over the bread. And don’t worry if the distribution is not even at first. When you bake the bread a second time with the caramel coating, the caramel will loosen and then you can stir the bread around in the now-liquid caramel to even coat it. From there, the rest of it is a waiting game. Waiting for the bread to toast, waiting for the caramel-bread to re-toast, waiting for the chocolate to harden before transferring everything into an airtight container. All in all, a fairly simple list of ingredients, and you will have a very addictive snack that highlights something most people would discard.
For the rusks:
Crusts from one bread loaf, cut into 1/4 inch-wide by 1/16 inch-thick strips
1 1/4 cups granulated sugar
10 tbsp unsalted butter
a pinch of salt
1/2 cup chocolate chips
On a lined sheet tray, bake bread at 350 degrees F for 20 minutes. The bread strips will be golden-brown, rigid, and crispy. Allow the bread to cool down slightly.
In a pot, heat up the sugar until it begins to turn brown, and add in the butter and salt. Stir everything together on low heat until the butter fully dissolves into the sugar and everything melts into a smooth saucy caramel. Pour the caramel over the bread strips. Bake at 350 degrees F for 10 minutes. While the bread strips are still warm, stir the mixture around using a rubber spatula, just to evenly distribute the caramel around the bread. Quickly sprinkle on the chocolate chips, and stir until they are melted over the bread as well. Allow the strips to cool down on a lined sheet tray, spaced out from one another, and store in an airtight container for later.