My friend Samantha(from season 9 and Back to Win) gifted me with these dinosaur cookie cutters back in January, but truthfully, I had zero ideas on what to do with these. I am not a major dinosaur enthusiast(I never even watched Jurassic Park, though I DID grow up on The Land Before Time rip Little Foot’s mom). So trying to figure out what kinds of recipes I could make with dinosaur cookie cutters was a hilarious back burner challenge for me. And then I saw two videos that guided me to this bizarre brain child. The first was someone making a mashed potato volcano with gravy lava and dino nuggets. But I did not want to make that exact dish. Mostly because Sam used those same cookie cutters to make dino nuggets from scratch, and I did not want to copy her, even though she is chock full of fantastic ideas! The other video, which is how I landed on this idea, was someone making these cute mini dinosaur cookies. Hilariously, the answer was right there: make dinosaur cookies with the dinosaur cookie cutters. I had no idea why something so obvious and straightforward eluded me for months. I was fixated on trying to be innovating with these cutters, when I should have just used them for what they were intended for. And then I realized, I could recreate that whole volcano and lava get tup very easily in dessert form. And that was how the idea for this dessert meets elementary school arts and crafts project came about.
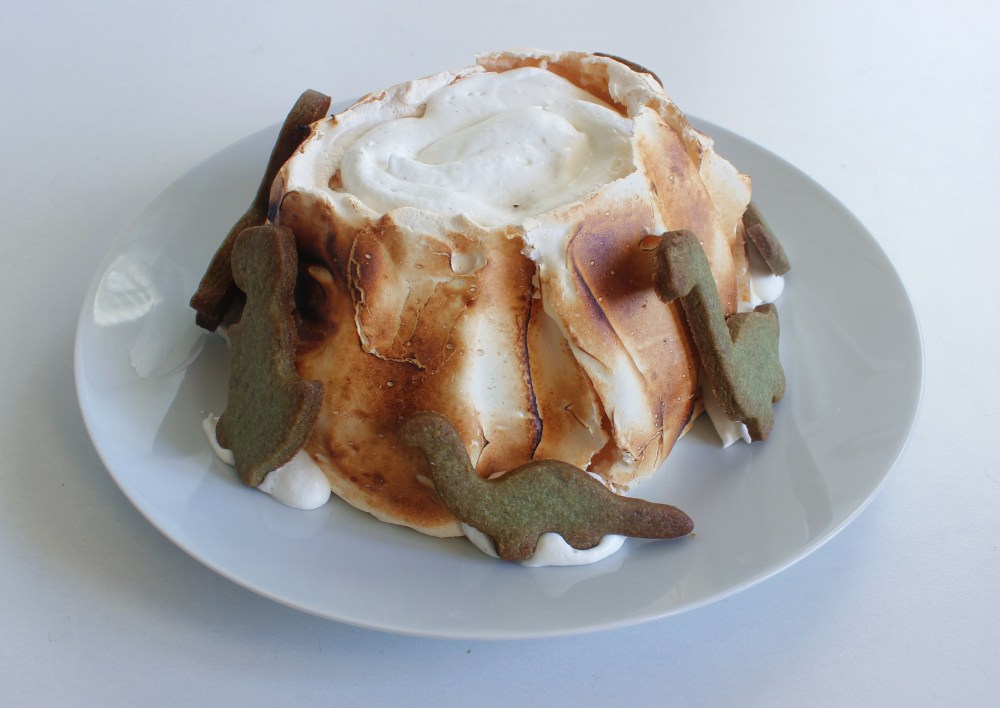
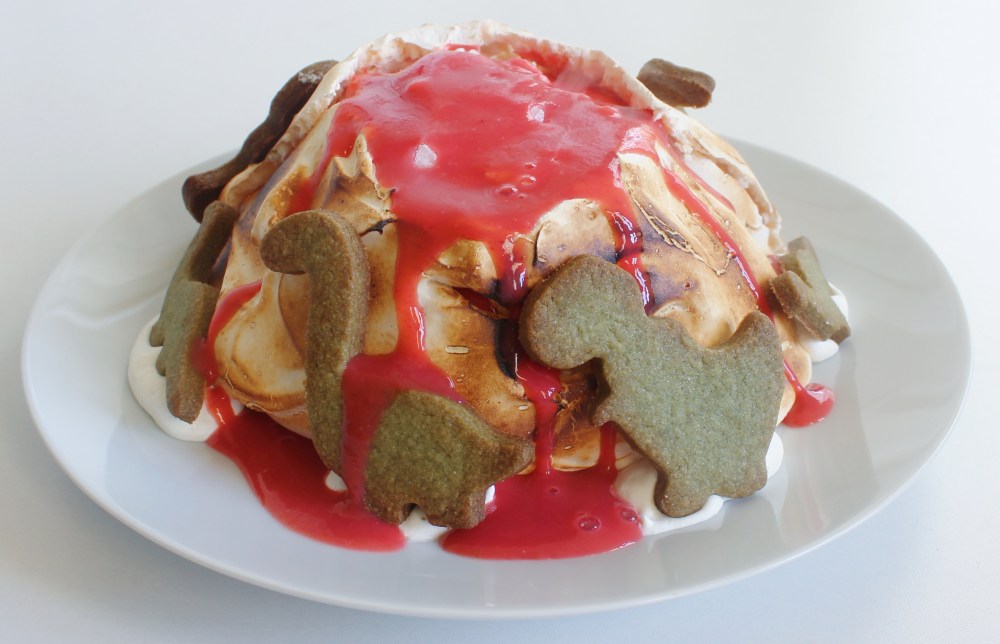
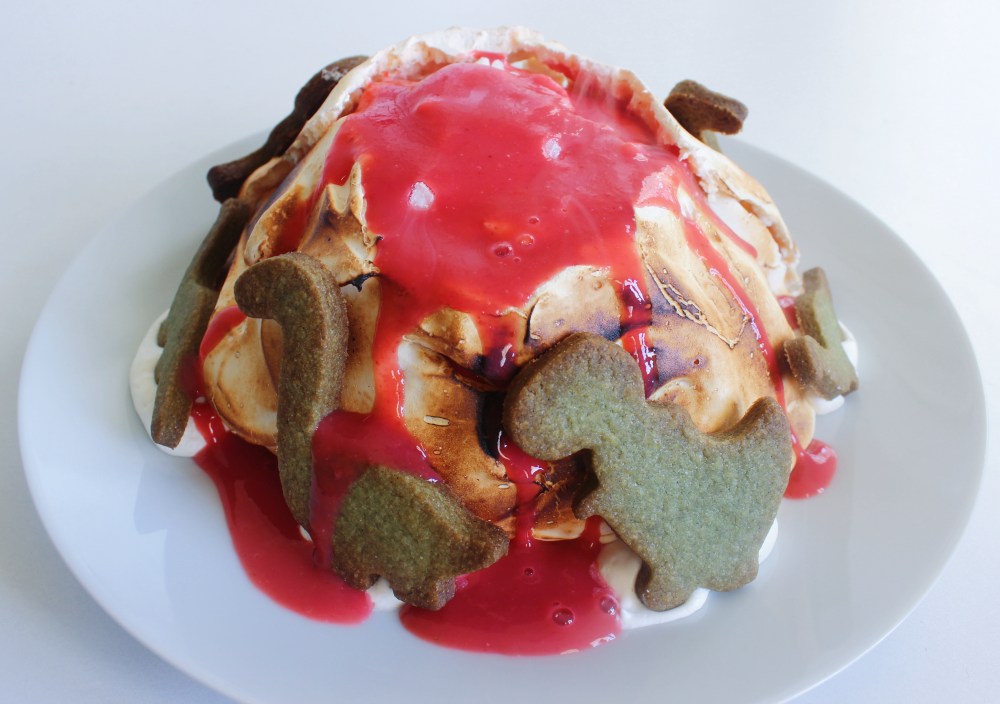
For the components, I wanted to keep it somewhat simple. Or at least closer to low effort, in the spirit of making a mashed potato volcano and reheating some dino nuggets. So I figured, four components is plenty, and we have the dinosaur shortbread cookies, which are matcha flavored for the green color, a pavlova “volcano” that I have dubbed “Mt. Pav-lava”, a strawberry coulis that will act as the lava, and a chantilly cream to act as like the glue at the base of the volcano to attach your cookies. Pavlova is a baked meringue-type of dessert that is usually served with fruits and cream, so that’s why I went the strawberry coulis and chantilly route with this. The strawberries came into play specifically because I was using matcha to flavor the dinosaur shortbreads, and because I wanted tart flavors to contrast the inherent sweetness of the meringue. Originally, I was going to include sesame flavor in this dessert as well, but I found that the sesame powder I used caused my meringue to deflate in the oven, and since each attempt at a pavlova takes about 3 egg whites and 2 1/2 hours of baking time, as much as I wanted to attempt using ground sesame seeds for a different result, I did not want to use up more egg whites than I needed to nor did I want to set myself back potentially 5 hours across two more attempts – ironically I had to attempt the pavlova 3 times, so I wound up spending 7 1/2 hours on this recipe to pinpoint the perfect pavlova. In the end, I went with what was proven to work, and did a plain vanilla pavlova, which came out quite nicely. The exterior of the pavlova was crispy and crunchy while the inside was still marshmallowy and light, like a just-whipped meringue. It really is the best of both kinds of meringue textures, and made better with this variation since I toasted the exterior to give it more of that volcano-like appearance, but also a toasted marshmallow flavor. While they are a very sugar-forward and sweet dessert, pavlovas are actually quite tasty, especially with the strawberry coulis I paired it with, and I now get the love of a pavlova; I devoured the whole thing on my own.

In terms of technical difficulty, and this applies to this dessert more than usual with some of my other recipes, time and patience are key. A pavlova, being a baked meringue, takes a lot of time to cook and dry out in the oven. Since we are doing a volcano-ish shape, where there is a cratered top, that does add more surface area that helps the meringue dry out better for the center portion of the pavlova. I recommend getting the shortbreads done first, then working on the meringue, since that way, the shortbreads are fully cooled down and ready to decorate the volcano with when it finishes baking. That and the oven will be optimally preheated for the meringue itself. With the pavlova volcano, or as I am dubbing it, “Mt. Pav-lava”, there were hiccups I ran into. In terms of executing it, I had two failed attempts before the successful one that is posted here. The first attempt, I used this sesame powder which contained maltodextrin, so my meringue volcanoes wept and sank instead of holding their forms in the baking process. For my second attempt, I over-whipped my egg whites, so even after 2 1/2 hours of baking, the meringues were still soft. With the third attempt, I watched the meringue like a hawk, making sure that the egg whites were whipped to a stiff peak, but weren’t so whipped that they resembled bubbles in a bathtub. So long as the meringue is still easy to spread, the sugar is dissolved so that the meringue is not grainy in texture, and holds its shape when you tilt the mixing bowl it was whipped in, you are good to go with spreading and baking it into a pavlova. In terms of storage, and admittedly, this is what gave me another challenge, I realized none of my Tupperware could store the monstrosity that was Mt. Pav-lava. Eventually I found that the pavlova could be stored, un-filled, in my oven, turned off and door closed, for at least 20 hours without the meringue getting damp or soggy. Keep that shelf-life in mind when making this, since you can make the pavlova up to 24 hours in advance, though try to fill it only 30 minutes to 1 hour before actually serving for optimal textures, i.e. the crispy exterior of the meringue. If you want to add a little extra drama, I recommend placing a single cube of dry ice into the crater of Mt. Pav-lava, and then when you pour the strawberry coulis over that, it erupts!
Makes 1 pavlova and 28 shortbreads:
For the matcha dinosaur shortbreads:
1 cup all-purpose flour
1/4 cup granulated sugar
1 stick unsalted butter
1 tsp ceremonial grade matcha powder
a pinch of salt
1 tsp vanilla extract
1 egg yolk
In a bowl, mix the flour, sugar, butter, salt, and matcha until everything is combined into a sandy-textured dough. To that, mix in the vanilla and egg yolk to form your dough. Place the dough between two sheets of parchment and roll it out until it is 1/4-inch thickness. Refrigerate the dough log for 20 minutes – it should be firm, but the parchment should pull away from it cleanly. Cut out the cookies from the dough, re-rolling and re-chilling the dough as needed to use it all up. Bake the cookies at 350 degrees F for anywhere between 12-15 minutes, depending on the actual size of the cookies themselves – you do not want the baked cookies to be wet or squishy in the middle when they are baked. Allow your cookies to fully cool before transferring them to an airtight container.
For the pavlova “volcano”:
3 egg whites
1/4 tsp cream of tartar
1 cup granulated sugar
1 tsp cornstarch
a pinch of salt
1 tsp vanilla extract
In a clean bowl, whip the egg whites with cream of tartar to soft peaks first. Then whisk into that half of the sugar first until the egg whites re-stiffen to soft peaks again. Then whisk in the remaining sugar, cornstarch, salt, and vanilla, continuously whipping the egg whites until they are smooth in texture(no sugar granules) and stiff peaks form. Transfer the meringue onto a parchment-lined sheet tray and using an offset spatula, shape the meringue into a roughly 6 inch-diameter based cone. Using a bent spoon, press the top in to form your crater. Preheat your oven to 375 degrees F first. Then lower your oven temperature to 250 degrees F and bake the pavlova in the oven for 2 1/2 hours. Allow the pavlova to cool down completely in the oven, turned off with the door slightly ajar, before moving it into an airtight container. Only store this for 24 hours, as any longer and your pavlova will begin to dissolve!
For the strawberry coulis “lava”:
8oz hulled strawberries
1oz lemon juice
1 tbsp granulated sugar
a pinch of salt
In a blender, puree everything until smooth. Pour the liquid into a pot and bring to a boil, stirring the liquid so that the coulis at the bottom does not burn. Chill down the coulis before using.
For the chantilly:
1/2 cup heavy cream
1 tbsp confectioner’s sugar
1/4 tsp xanthan gum
a pinch of salt
1/2 tsp vanilla extract
Whip everything together until stiff peaks form. Transfer to a piping bag and refrigerate before using in the assembly of Mt. Pavlava.
For assembly:
Blowtorch with butane
1oz finely crushed dry ice
Torch the exterior of the pavlova until it is browned so that it resembles a volcano. When ready to serve, pipe the cream into the crater, as well as around the pavlova. Garnish the sides with the cookies. Place the dry ice into the grater, and pour the strawberry coulis into the crater to see it bubble up like lava!

One Comment Add yours