While in the midst of my crash dieting, I have developed some hilariously random cravings. Super fluffy pita bread has been one of those. About a year ago, I had dinner with my friends in downtown LA, at a restaurant called Girl and the Goat(which is best known for their flagship in Chicago, and being owned by Top Chef winner and Iron Chef, Stephanie Izard!). And on their menu was this suuuuuper fluffy pita bread. The exterior was light, pillow-y, and spongy, while also having a nice smokiness from being baked in a woodfire oven. The interior, as all good pita should be, was nonexistent, making it the perfect vehicle for the suckling pig we ordered with it. I literally devoured it on its own, because of how delicious it was. And since 2/3rds of my meals nowadays consist of of either spinach smoothies or chicken breast and kale salads, that definitely contributes to my cravings for carbs. There have been dark, dark moments where I could flip a table for a platter full of pita from Girl and the Goat. And that was where I got the idea to make my own!
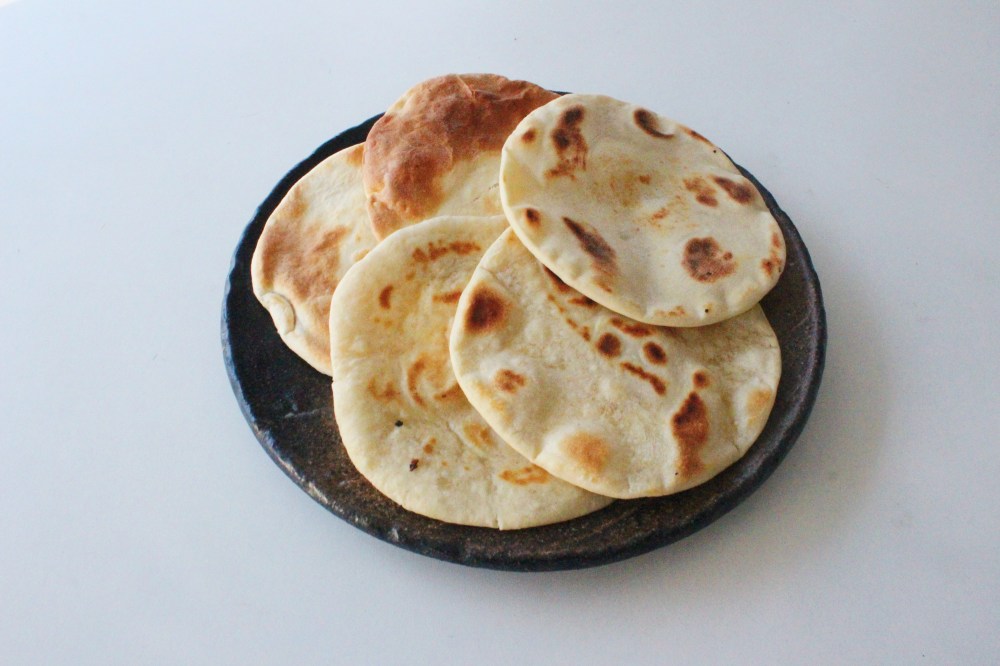
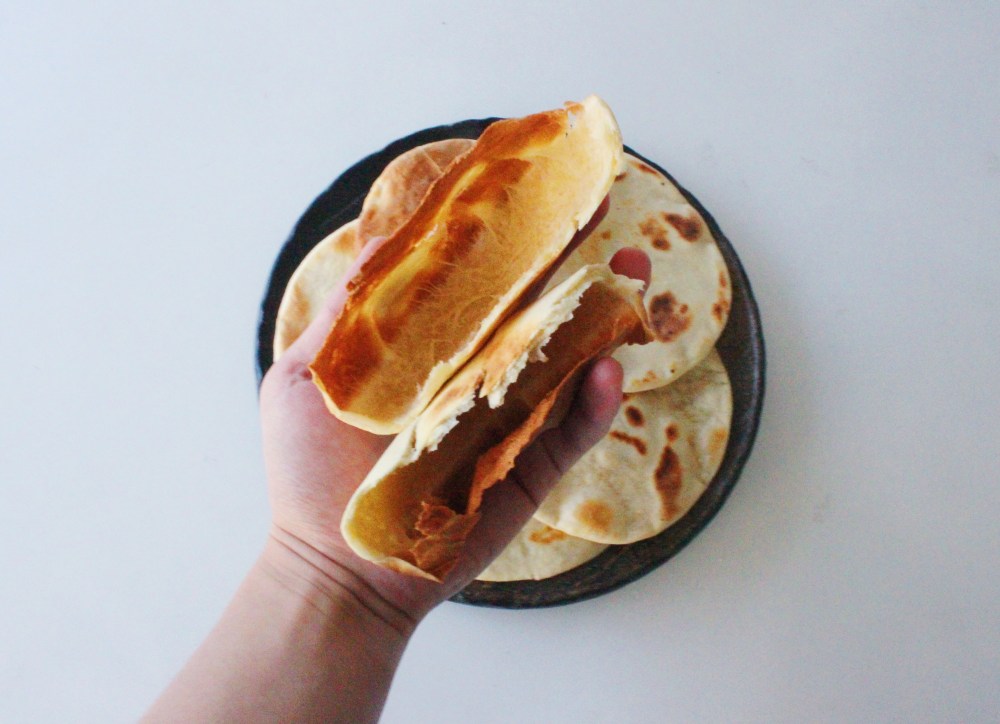
For the bread itself, I do have familiarity with making na’an, so I approached it in a similar fashion. The key to a really good pita is that it puffs up, and is almost completely hollow in the middle, which is what I was aiming for. I actually had to run a few tests on these, because my first batch did not quite turn out like how I would have liked. While I rested the dough enough, a combination of how I rolled and cooked the dough resulted in pitas that were either burnt and barely puffed, or completely raw and dense. I found that with my recipe, by dividing the dough into three pitas, rolled out to about 6 inches(if you don’t have a ruler, but have an iPhone, just know iPhones are about 6 inches in length so you can just use that as a reference when rolling out your breads!), resulted in pita that was more to my liking. More to my liking in that it was soft and fluffy, while baked all the way through, with just a few speckles of brown on the exterior, instead of it being burnt like my first few attempts(RIP). I wanted this bread to be very light and soft to the touch, almost like a really warm wool blanket. That and because it was really cold when I was testing this recipe, and wanted super warm bread to keep my fingers from freezing off. I ran a couple of tests using yogurt and just plain water, but I found that the cultures of the yogurt resulted in a softer bread with a spongier texture that I just preferred.
Now for some science, because I did a fairly extensive amount of research on pita prior to making it myself. What I found was the reason for why pita puffs is amount of moisture inside of the dough vs the gluten content vs the heat at which it is cooked at. The dough naturally contains moisture from being made with yogurt and olive oil, while the gluten, proteins formed from kneading flour with water, is what holds that moisture in. When exposed to high enough heat, the moisture in the dough begins to evaporate rapidly, causing the dough to puff up, while the glutens contain that, forming a shell around the evaporating or expanding gases, creating this balloon-like effect! It is quite similar to the science behind choux pastry, which is used to make cream puffs! There is an argument about using yeast vs yogurt, and even some pita recipes are just as simple as flour, water, and olive oil! For me, I went with yogurt in mine, since I wanted there to be some cultures, but I did not want to bust open a packet of yeast for such a small amount of dough. Plus the yogurt creates a spongier texture too that I prefer with this kind of bread!
Makes 3 pitas:
1 cup all-purpose flour(traditional pita uses whole wheat, so you can sub it out with this as well!)
1/2 cup Greek yogurt
1 tbsp olive oil
a pinch of salt
Mix ingredients together to form a smooth and supple dough. Knead the dough until it springs back when pressed down. Divide the dough into 3 pieces and roll each piece out on a lightly oiled surface to about 6 inches in diameter. Cover with cling film and refrigerate for at least 30 minutes(the longer you rest it, the more flavorful the dough will become!). Allow the dough to rest at room temperature for at least 5 minutes. Heat up an oven to 500 degrees F with either a cast iron or a pizza stone in it. Once the oven is preheated, lower the temperature to 475 degrees F. One at a time, place a pita onto the baking surface, and bake, with the oven closed, for 90 seconds. Then flip and cook for another minute. Keep the baked pitas covered with a clean towel so that they do not dry out as they cool down. Serve with hummus, or olive oil and sumac while still warm, or store in an airtight container and freeze them!

Fred, you just keep on giving. From fancy desserts to ordinary Pita, you make and know them all. You are so talented… hope you know that already!
LikeLiked by 1 person
I saw your MasterChef video on Instagram and came to your blog, and I am hooked. This blog is the gift that keeps on giving. Thanks brother for the amazing recipes.
LikeLiked by 1 person